1. Overview
1a. Purpose
This manual guides you in setting up, using, and maintaining an OPS (Open Pluggable Specification) system integrated with a Windows OS for classroom activities. It includes instructions on using basic applications, managing storage, clearing cache, updating date and time, and using USB devices.

1b. About device
The following table displays the specifications of OPS. The device comes pre-installed with Windows 11, the latest operating system from Microsoft, offering a user-friendly interface, enhanced security features, and support for a wide range of applications.
Processor: Equipped with an Intel Core i5 processor, the device ensures high performance, allowing users to run multiple applications simultaneously without any lag.
RAM and Storage: With 4 GB of RAM, the device can handle intensive tasks such as video editing, gaming, and data analysis. The 512 GB SSD.
| OPS Features | |
| OPS | Specifications |
| Processor | 12th Generation i5 / with Windows 11 Professional |
| Memory | 512GB SSD |
| RAM | 4 GB |
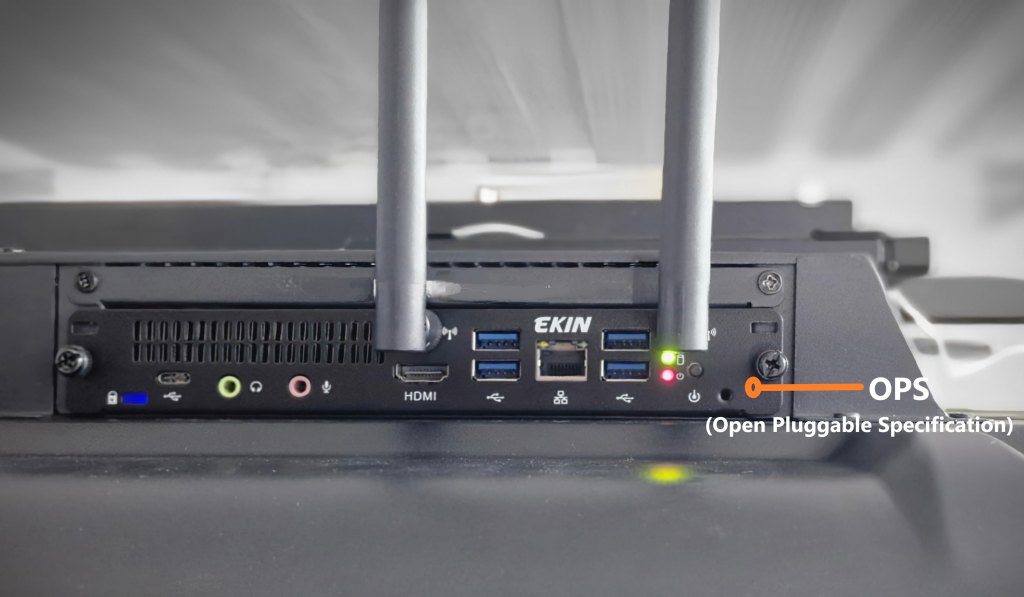
2. Ports
The OPS is placed in the designated slot behind the IFP display and automatically turns on when the IFP is powered on.
3. Basic Applications
Using Pre-Installed Applications
Microsoft Office Suite: Includes Word, Excel, and PowerPoint for creating documents, spreadsheets, and presentations.
Web Browser: Access the internet using browsers such as Microsoft Edge or Google Chrome.
File Explorer: Manage files and folders on your OPS system.
Installing new applications
- Microsoft Store:
- Open the Microsoft Store from the Start menu.
- Search for the desired application and click “Install.”
- Downloading from the Internet:
- Use the browser to download installation files.
- Follow the prompts to install the new software.
4. Storage Management
4a. Viewing Storage Usage

Open Settings
Click on the Start menu and select “Settings.”
Go to Storage
- Navigate to “System” and then “Storage.”
- View the storage usage of the OPS system, including how much space is used by apps, files, and other data.
NOTE: The total storage size of the OPS is 512 GB.
4b. Managing Storage
Delete unnecessary cache files
- In System > go to Storage > Cleanup Recommendations to clear unwanted files and caches
- You can select the things to be deleted and click on Clean up to clear storage space.
Use Storage Sense
Enable Storage Sense in the Storage settings to automatically free up space by deleting temporary files and emptying the Recycle Bin.
5. Managing Wi-Fi Connectivity
WiFi: toggle button to turn on or off WiFi
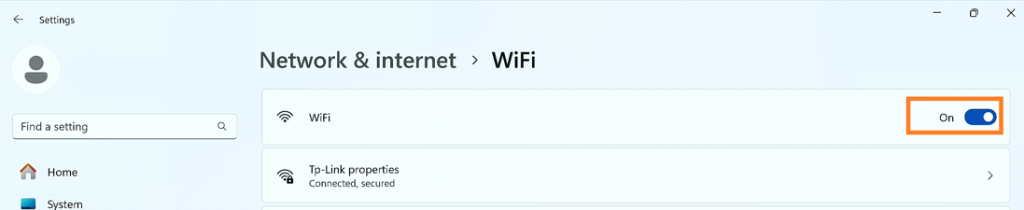
Turning Wi-Fi On/Off
Open Settings
Click on the Start menu and select “Settings” (gear icon).
Go to Network & Internet
Select “Network & Internet” from the Settings menu.
Wi-Fi Settings
- Click on “Wi-Fi” in the left-hand pane.
- Toggle the switch to turn Wi-Fi on or off.
Connecting to a Wi-Fi Network
Open Wi-Fi Settings
Follow the steps above to open the Wi-Fi settings.
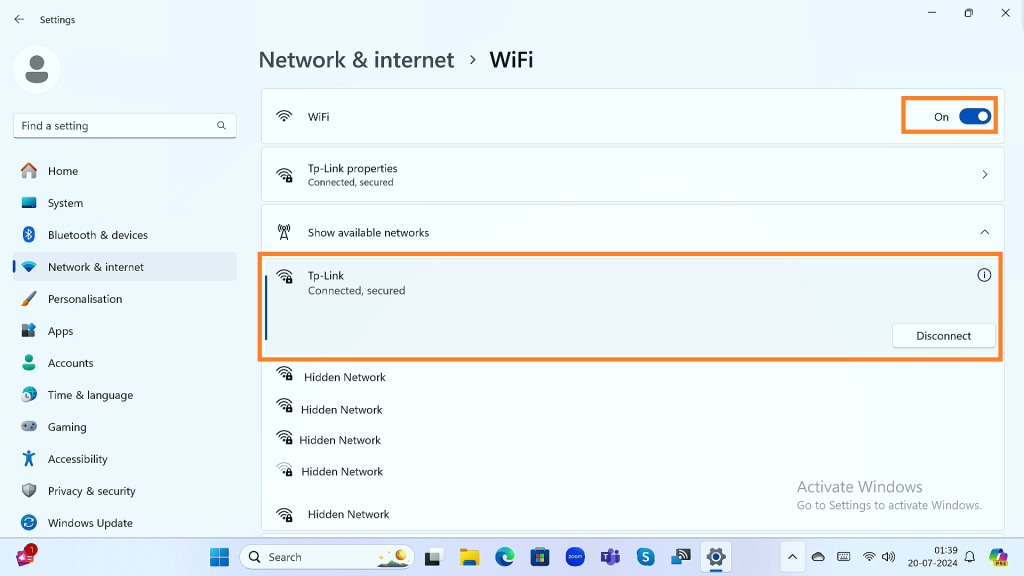
Select Network
Click on the Wi-Fi network you wish to connect to from the list of available networks.
Enter Password
If prompted, enter the network password and click “Next.”
Connect
Wait for the connection to establish. A notification will appear once you are connected.
Add New Network: Select WiFi and enter the password.
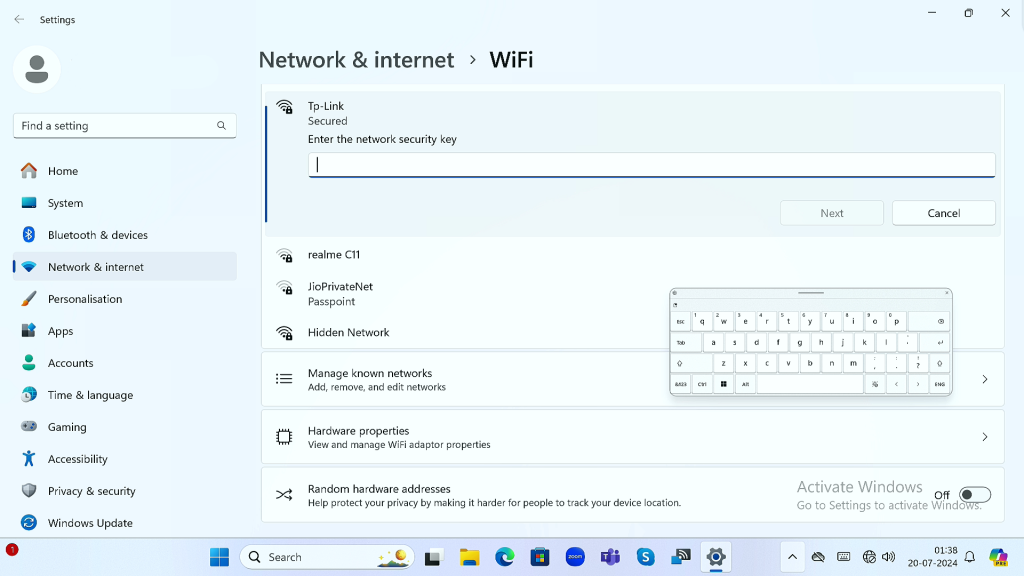
List of connected devices and available devices appears.
6. Updating Date and Time
6a. Automatic Date and Time
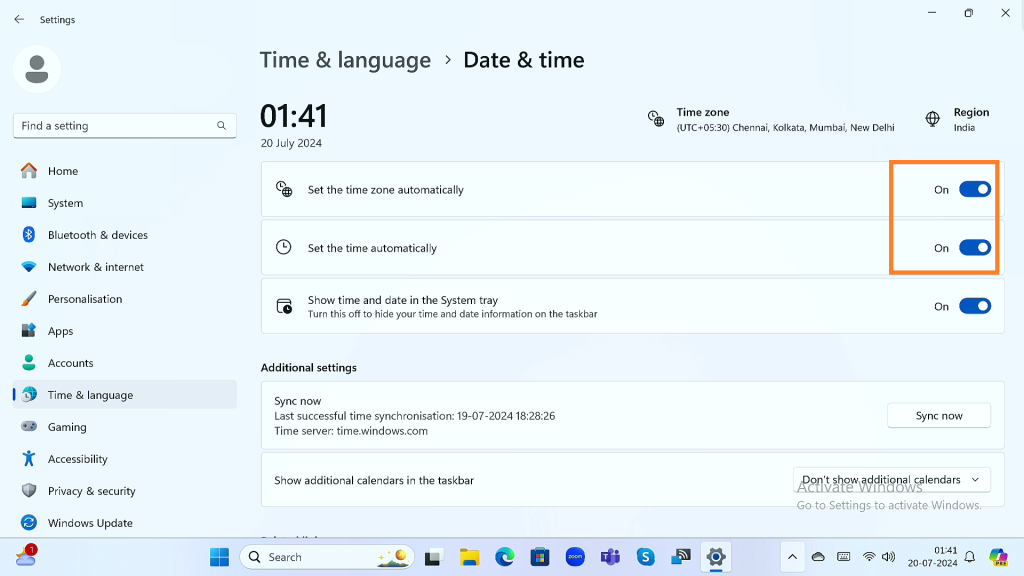
Automatic Date and Time.
Open Settings
Click on the Start menu and select “Settings.”
Go to Date & Time
Navigate to “Time & Language” > “Date & Time.”
Enable automatic settings
Turn on “Set time automatically” and “Set time zone automatically.”
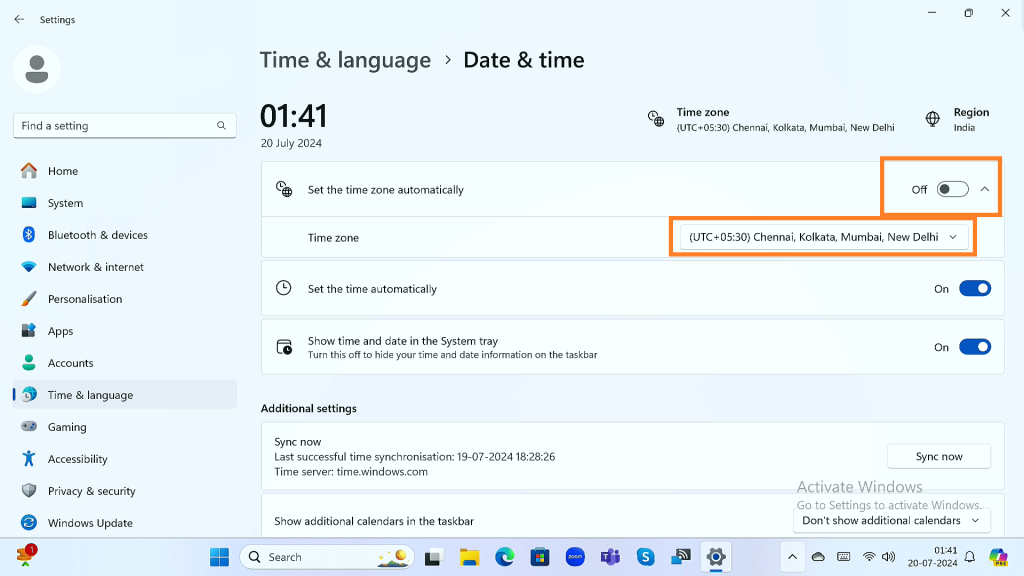
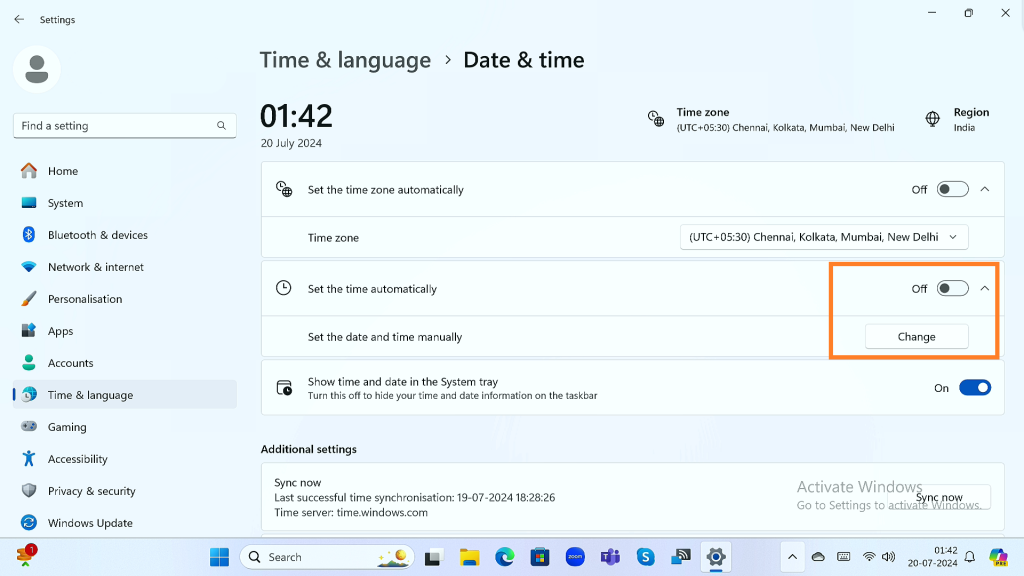
6b. Manual Date and Time
Manual Time Zone setting: Select the correct Time zone.
Manual Date Setting
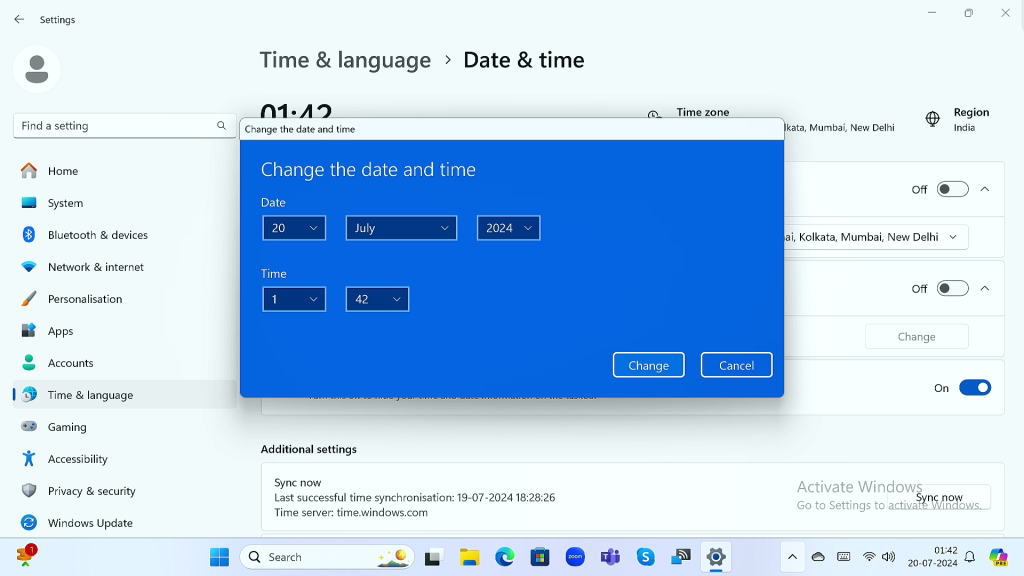
Manual Date Setting – Popup Window Date and Time.
Open Settings
Click on the Start menu and select “Settings.”
Go to Date & Time
Navigate to “Time & Language” > “Date & Time.”
Set date and time manually
- Turn off “Set time automatically.”
- Click “Change” under “Set the date and time manually.”
- Adjust the date and time as needed and click “Change.”
7. Using USB Devices
7a. Connecting a USB Device
Insert USB
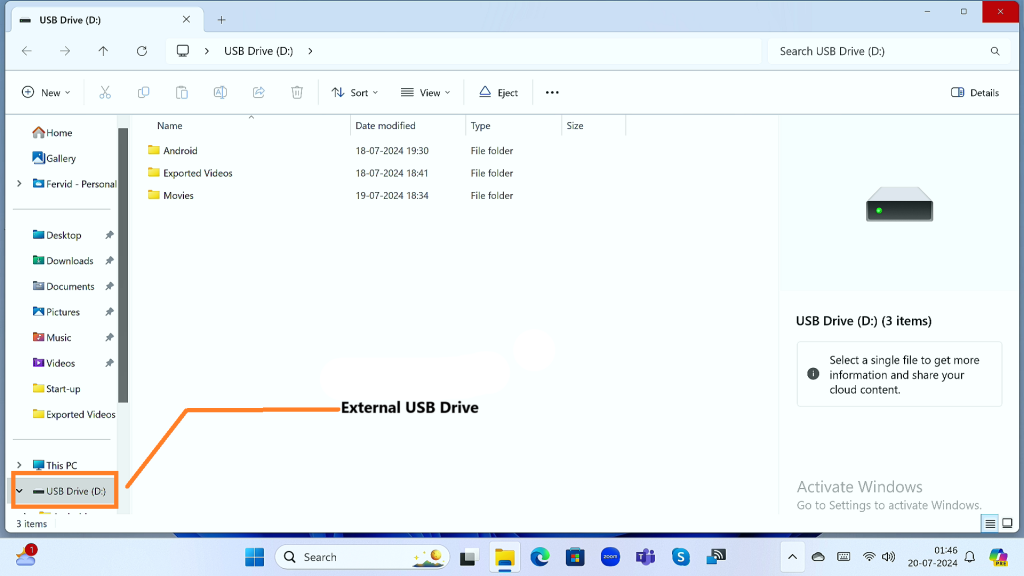
Insert the USB device into a USB port on the OPS module.
Access Files
- Open File Explorer and navigate to “This PC.”
- The USB device should appear as a removable drive. Click on it to access the files.
7b. Ejecting a USB Device
Safely Remove Hardware
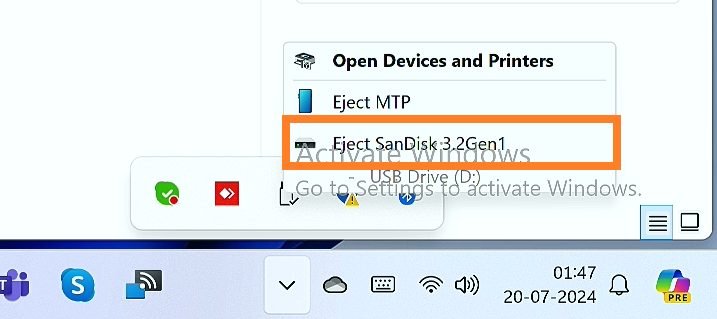
Click on the “Safely Remove Hardware” icon in the taskbar (usually near the clock).
Eject Device
- Select the USB device you want to eject and click “Eject.”
- Wait for the notification that it is safe to remove the device, then unplug it from the USB port.
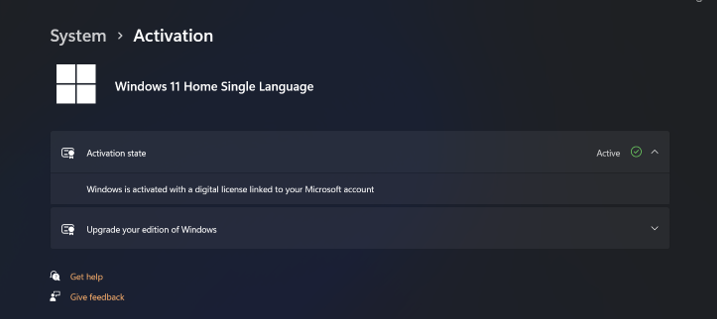
8. Windows Activation
When the license is not activated or expired, there will be a message on the screen above the date and time.
If your system displays the same message, please reach out to the customer care number provided for support.
You can also check the status of your Windows. You can go to Settings > Systems > Activation and check the status of the Windows activation state.
9. Troubleshooting
Common Issues and Solutions
Restart System
Restart the display and OPS module to refresh the connection.
Application Crashes or Freezes
Update Software
Ensure all applications and the operating system are up-to-date.
Reinstall Application
Uninstall and reinstall the problematic application.
Storage Full
Free Up Space
Delete unnecessary files and uninstall unused applications.
External Storage
Use an external USB drive for additional storage.
USB device not recognized
Try a different USB port. Check if the USB device works on another computer. Update the USB drivers in Device Manager.
The date and time are incorrect
Ensure “Set time automatically” is enabled in the Date & Time settings. If manual adjustments are needed, follow the steps in the “Updating Date and Time” section.
Cannot connect to Wi-Fi
Ensure Wi-Fi is turned on. Check if the network password is correct. Restart the OPS system and try connecting again. Update Wi-Fi drivers if necessary.
10. Product Support
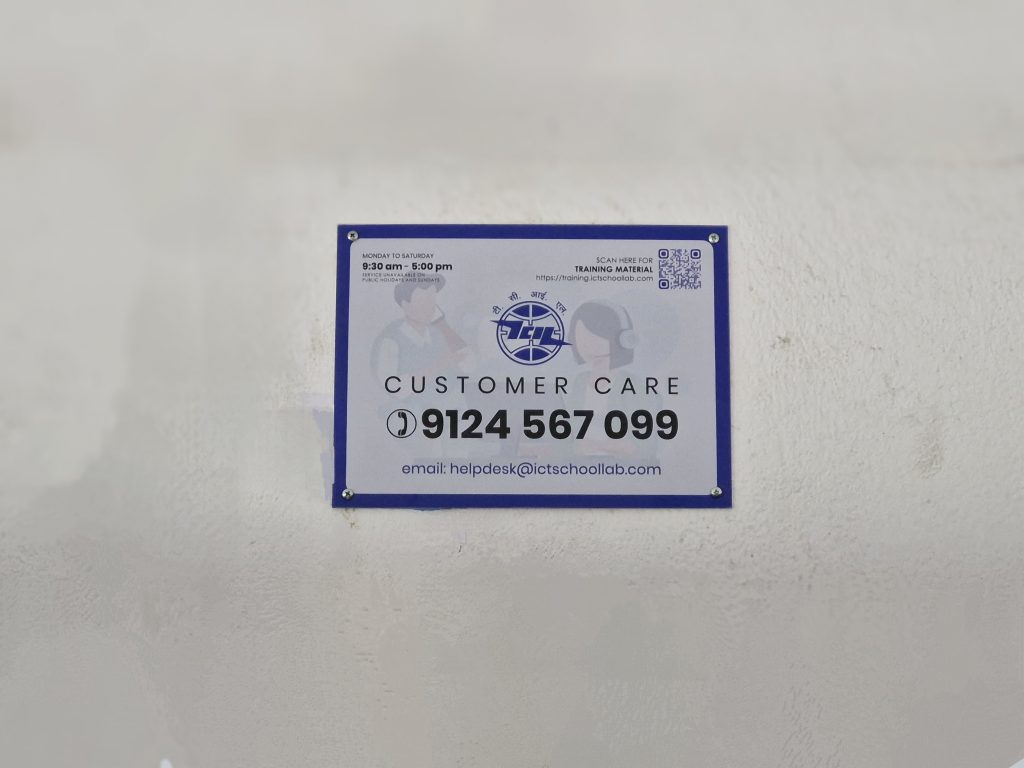
The product is fixed to the IFP panel, so if there is any issue with turning on/switching to Windows from Android even after troubleshooting, please reach out to the customer care contact number. You can raise the product issue with the support team for a quick resolution.
For any queries or further assistance, please contact our Customer Support:
- Phone: 9124 567 099
- Email: helpdesk@ictschoollab.com